Code fragments to not forget

Month: January 2020

Ok google 101 in c# – part 5

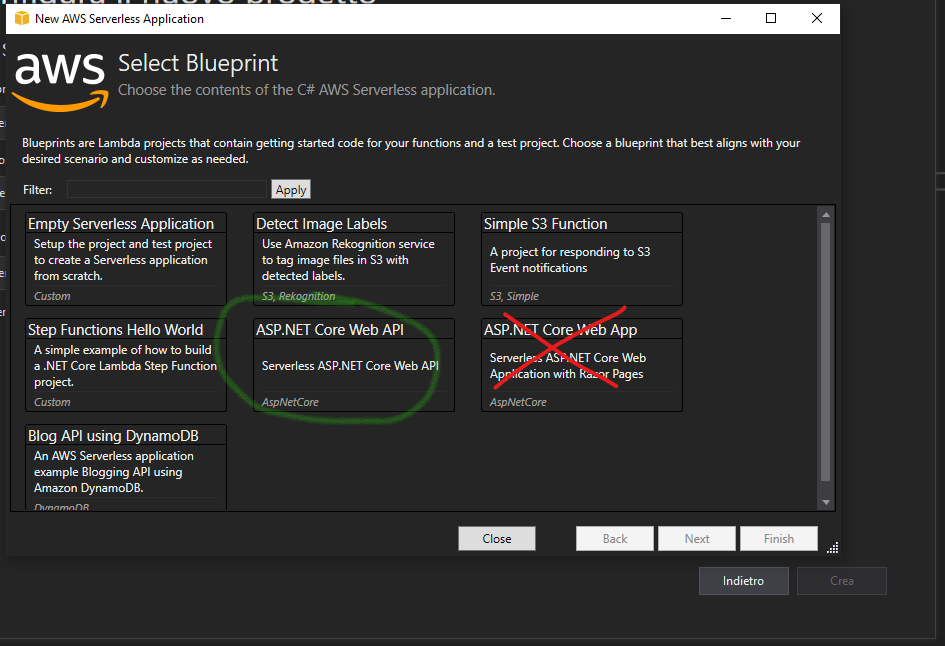
In part four we’ve created an empty AWS lambda application to answer to the Google Smart Home requests, now it’s time to really implement it.

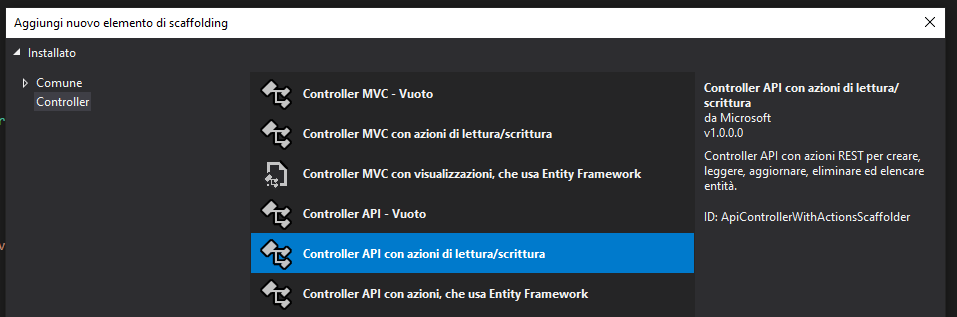
To fullfill the requests coming from the Google Assistant we need to implement 4 REST API in our AWS fullfillment .net Core Web API c# solution:

  • SYNC
  • QUERY
  • EXECUTE
  • DISCONNECT
  • REPORT STATE

There is an official library for .net (nuget), but since is bad documented we’ll implement a minimal set of the Google Smart Home SDK, just for the thermostats.

SYNC

The first call from Google is sync, which asks for the list of thermostats. The token for the thermostat backend is in the Authorization header, and the body contains a JSON with the SmartHomeRequest object:

public class SmartHomeRequest
    {
        public string requestId { get; set; }
        public List<RequestInput> inputs { get; set; }

        public SmartHomeRequest()
        {
            inputs = new List<RequestInput>();
        }
    }
public class RequestInput
    {
        public string intent { get; set; }
    }

With the authorization bearer token in the header (coming from the account linking phase) we can retrieve the list of thermostat, and pack it a SmartHomeResponse object:

With this c# models we can elaborate the answer needed by Google in the POST fullfillment call:

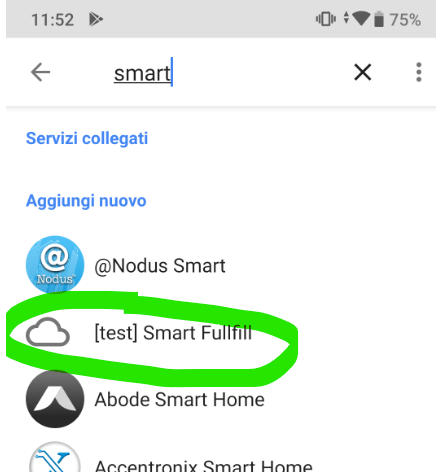
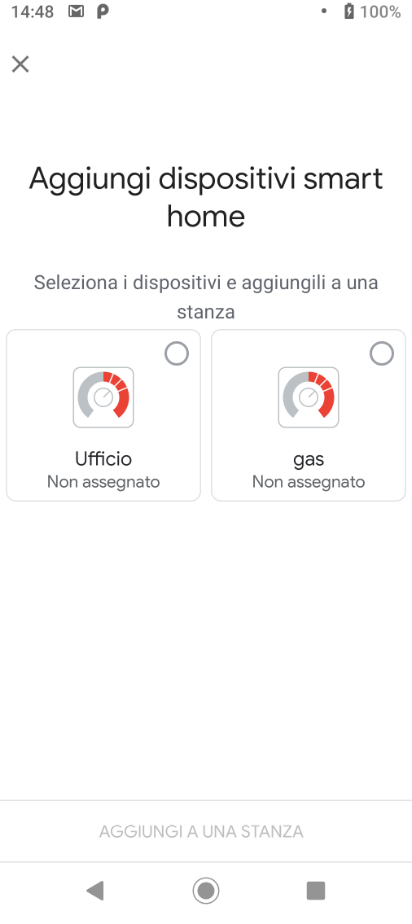
We have given Google the list of thermostats. If we test now in the smartphone Home app, when we do the account pairing with [test] Smart Fullfill we get the list of thermostats:

QUERY

Ask the fullfillment server the current real-time status of one or more devices.

NOTE: there are two ways to know the status of device:

  • QUERY call to fullfillment server
  • Report State: the thermostats are constantly connected to the Google Home Graph sending statuses

When the Google Assistant is asked for the status of a thermostat, it issues the fullfillment server a QUERY POST call, asking the current real-time status. We just need to put together a JSON like this with data coming from the IoT backend:

{
  "requestId": "ff36a3cc-ec34-11e6-b1a0-64510650abcf",
  "payload": {
    "devices": {
      "123": {
        "online": true,
        "thermostatMode": "cool",
        "thermostatTemperatureSetpoint": 23,
        "thermostatTemperatureAmbient": 25.1,
        "thermostatHumidityAmbient": 45.3
      }
    }
  }
}

EXECUTE

Send one or more commands to the fullfillment server for one or more thermostats.

DISCONNECT

Stop reporting to this user.
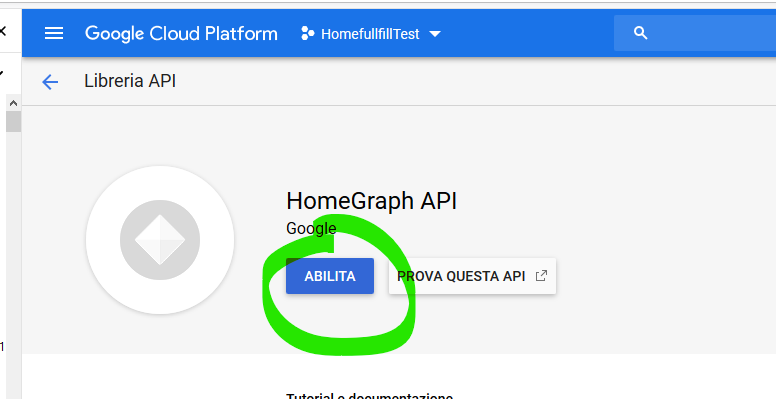
Report state

The Home Graph is a database of your house devices, and it will contains our thermostats. To show the temperature of this thermostats, especially in the visual-assistant devices, the database must be kept updated with the latest temperatures coming from the thermostats. Every now and then we should call the report-state-api updating the Home Graph. The best moments to call it are:

  • After the SYNC fullfillment request
  • After each QUERY fullfillment request
  • After every EXECUTE fullfillment request

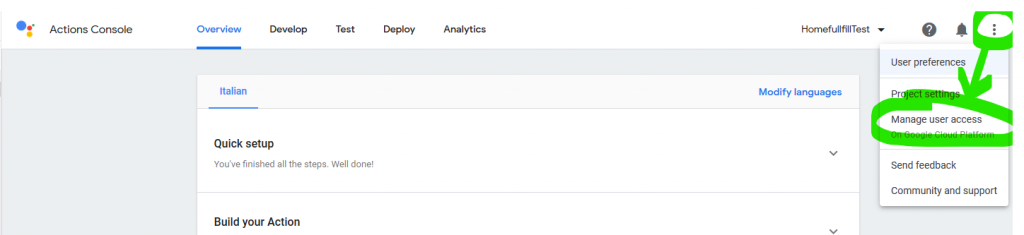
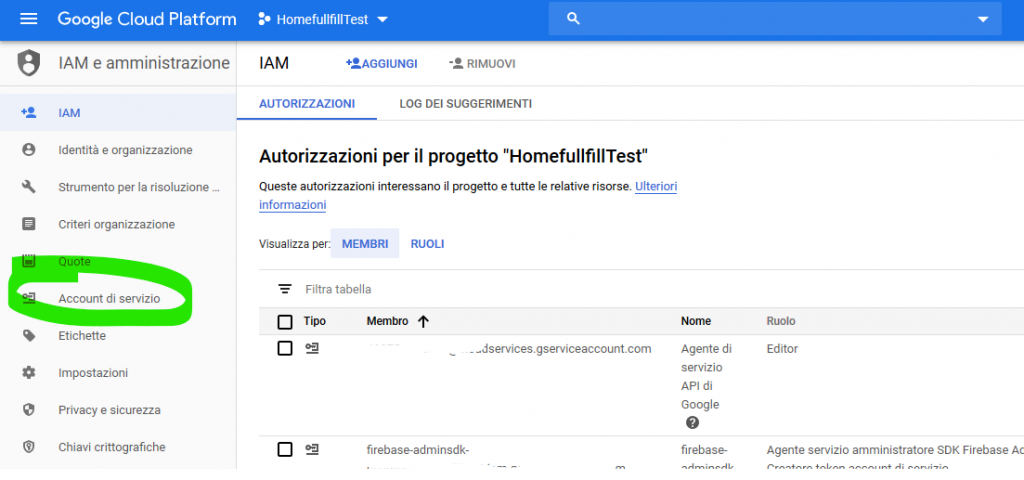
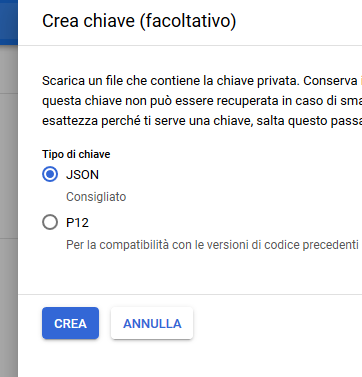
To call report state API we need a private key. To see the code and how to call the report state API look at the JWT post.

Once the fullfillment API is ready and published on AWS, we insert its public address in the intents tab:

Now it’s time to test.

End of part 5 — Part 6

Sign a Google API JWT in .net C#

In a Google Smart Home project I needed my .net core server application to call the Report State API. The call needs to be authorized by an OAUTH 2.0 access token.

There are many steps to perform on the Google Cloud Platform console (GCP) to obtain this token:

  1. Access to the Smart Home account in the GCP console
  2. Add a Service account of type service account token creator
  3. Download the private key of the service account (a JSON file)
  4. Enable the API you want to call

Then in the .net application you need to:

  • Craft a JWT for the request
  • Sign the JWT with the service account JSON private key
  • Call the Google OAUTH 2 service to get the access token
  • Use the fresh access token to call the API

Let’s begin!


1- Create/select the GCP account (the right one!)

WARNING: this first step can be tricky!

The GCP console contains all of your projects. And it should contains also the project related to the Google Smart Home action. To be sure to select the right GCP project go in the Actions console, select the action you are working on, and click on the upper right menu, then click Manage user access on Google Cloud Platform.

You will be redirected to the IAM page of the relative GCP account, with all the resource listed. Click on Service Account:

2- Add a service account

The service account is needed in the machine-to-machine flow, exactly when our .net server application call the Report State API. We need to create a service account and give it the Service Account Token Creator role:

3-The JSON private key

Click on ‘Create Key‘ to download the JSON private key file:

Select the JSON file type:

Keep safe the JSON file.

4-Enable the Report State API for this GCP account

To call the API it must be granted. In the GCP dashboard click the API arrow:

Add the HomeGraph API:

.net application

The official Google guide is here. This tutorial is for a .net project that needs to call the Report State API: https://www.googleapis.com/auth/homegraph

There is a little-to-none documented .net library for the HomeGraph API available via nuget: Google.Apis.HomeGraphService.v1.

With this library is possible to create the JWT, sign it with the secret key directly from its JSON file, ask for access token and call the ReportState API in just one call!

Ok google 101 in c# – part 4

Fullfillment server

Google will send all its requests to the fullfillment URI.

We will serve this URI with a ASP.NET Core Web API, hosted on an AWS Lambda.

To create a Visual Studio solution that deploys in an AWS Lambda follow my previous post. In this post we will focus on the ASP.NET project. The only difference here, is that we use the ASP.NET Core Web API template:

Delete from the templated project the two sample APIs S3ProxyController and ValuesControlles. Right click on Controllers folder and select Add new: Controller (of type API):

The controller will have only one POST endpoint:

 [Route("api/v1/[controller]")]
    public class GoogleController : Controller
    {
// POST: api/v1/Google
        [HttpPost]
        public IActionResult Post([FromBody]object intent)
        {
            try
            {
                Console.WriteLine("Google.POST. Intent=" + intent);
            }
            catch (Exception ex)
            {
                Console.Error.WriteLine("Google.POST Generic: " + ex);
            }
        }

For now we just log what we receive to be sure we are receiving something.

Let’s publish the Web API on AWS. Once published we will use the URL to configure the Action:

We can start testing.

Test the draft version

The action is ready (in DRAFT mode), we can test it. Go to Console▶Develop▶Test:

Make sure that Testing on device is enabled:

Once the test is enabled we can go to our Android phone, that must be logged with same account, and open Google Home app:

Click + on the upper left ▶ Setup device ▶ Have something already set up?

Search for your action name:

Click on it to test the Account Linking.

Warning: this test will result in an error, but we should receive a REST API call to our fullfillment REST API (check on AWS CloudWatch):

[Information] Microsoft.AspNetCore.Hosting.Internal.WebHost: Request starting  POST https://XXXXX.execute-api.XXXXXX.amazonaws.com/Prod/api/google application/json;charset=UTF-8
Google.POST. Intent={
"inputs": [
{
"intent": "action.devices.SYNC"
}
],
"requestId": "10224884186323447126"
}

This means that the Account linking is working! ???

The next step is to implement the real fullfillment.

End of part 4Part 5

Powered by WordPress & Theme by Anders Norén