I’m working on an IoT thermostat project that needs integration with Alexa and Google Assistant.
The IoT architecture is quite standard:
IoT architecture
The IoT backend server offers a number of APIs to manage thermostats. It requires user authentication; once logged in a long-lived access token is issued and used in all subsequent API calls. It is a commercial server provided by a third-party.
Google Assistant / Smart Home
The technology behind “Ok google” is Google Assistant, a voice driven AI that interact with smart home devices. The same devices control can be achieved in the Google Home app.
The first step to connect the thermostat to Google Assistant is to create a smart home Action. [glossary]
A tipical Google voice Action requires these steps:
Define the grammars and keywords the users can pronounce, in every language you want to support
Handle all different paths of voice conversations
Trigger the right intent
Fullfill the intent (API calls, etc…)
Being in the smart home framework give us a big advantage: the conversation is already managed. You don’t need to define grammars, keywords, languages etc… The smart home framework will call directly our intents.
Account linking OAuth
When you say “Ok Google” you’re always logged in a Google account under the hood. It can be Google mini, our smartphone, or an Android TV; whatever device you’re using, it is always connected with some Google account. You can even setup Voice Match to automatically map your voice with your very personal Google account.
To use the thermostat you also need to be logged in the IoT backend server. So we need to link our personal Google accounts to our IoT account.
There is a (heavy) prerequisite: OAuth 2.
Minimal OAuth tutorial
We must provide Google an OAuth service. The quickest way is to use the so called implicit code flow, that is basically a single HTTPS endpoint:
GET https://myservice.example.com/auth
This endpoint accepts the following parameters:
client_id
redirect_uri
state
response_type=token
Then display a login/password GUI to let user authenticate in the IoT backend. If the user successfully login, the long-lived access token generated by the IoT backend is passed back to Google, redirecting the user’s browser to the redirect_uri.
OAuth authorization flow
To provide more security, and to be also Alexa-compatible, you can choose the authorization code flow.
This flow uses two endpoints:
Login page endpoint
Token exchange endpoint
If your IoT backend authentication system is already OAuth-compliant you can continue and configure the Google Action with your OAuth URLs.
If your authentication system is not OAuth-compliant you can develop your own OAuth server. Look at my other post about creating an OAuth server in Amazon AWS.
Google Smart Home and Alexa skills need to impersonate the user when calling private APIs, so an Account Linking is required.
Like the majority of the API economy, Google and Amazon support the OAuth 2 standard.
I will implement a OAuth server that supports the authorization code flow. This OAuth service will provide 2 endpoints:
Web login page
Token endpoint
It consists of a web login page that authenticates the user in my private API authentication system, and the provide back to Google/Amazon a grant code. With this grant code the Google/Amazon app can obtain from the token endpoint an access token and a refresh token. I will develop it in ASP.NET Core using a serverless AWS Lambda. For small number of calls (under 1 milion/month) it’s almost free. Most AWS services used in this tutorial are paid services, you have been warned!
This is the list of AWS services needed:
IAM: authentication service
CloudFormation
S3 bucket for CloudFormation files
APIGateway to get the Lambda public URL
Prerequisites
We need an AWS account and Visual Studio 2019.
Visual Studio ▶Extensions▶Manage extensions: install AWS Toolkit for Visual Studio 2019 (version now is 1.15.2.1).
The VS solution
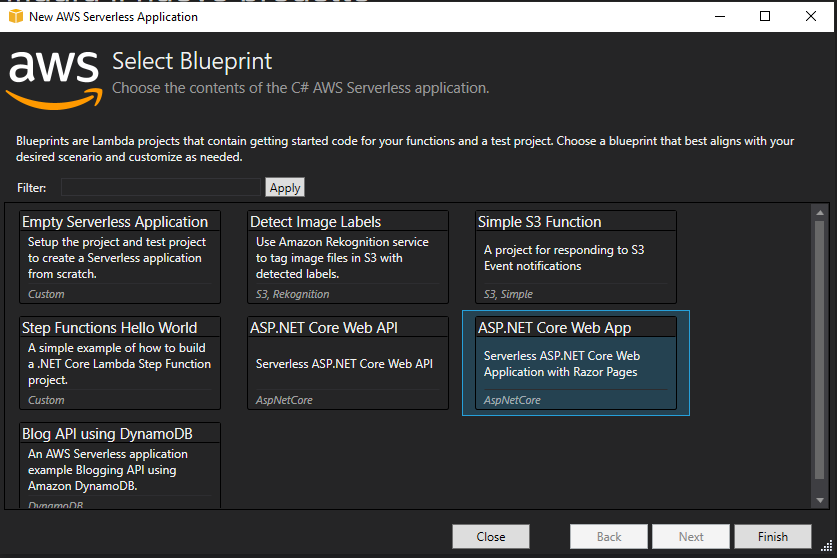
Create a new AWS Serverless Application (.NET Core C#):
In the next dialog select the ASP.NET Core Web App blueprint:
We will find a full ASP.NET core project, based on .NET Core 2.1 and a few Razor pages.
The OAuth authorization code flow will redirect the user browser to our login page using such an URL: https://myservice.example.com/auth along with 4 parameters:
client_id
redirect_uri
state
response_type
So let’s add an auth login page that can receive these four parameters.
The login page
The login page is a razor page with a login/password form:
public async Task<IActionResult> OnPostAsync()
        {
                //TODO: check url params
                var login = await _ApiService.LoginAsync(Username, Password);
                if (login) {
                    //TODO: generate a code
                    string uri = RedirectUri + "?code=XXXXX&state=" + State;
                return Redirect(rup);
            }
Summary: the login page is just a username/password form that authenticate against my private API backend, create an auth code, and redirect back to the caller, passing the auth code.
Token endpoint
The token endpoint is a Web Api controller:
Create an Api subfolder
Right click and select Add Items▶Api Controller Class
Call it ‘tokenController’
The token endpoint is responsible for two post action:
receive a grant auth code and return refresh+access tokens
receive a refresh token and return an access token
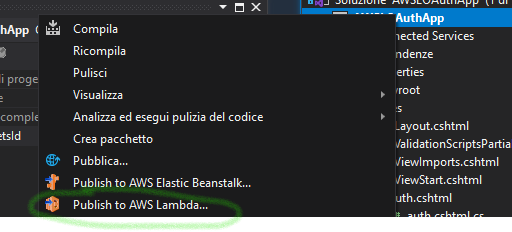
Now that we have a working ASP.NET razor login page, and the token POST endpoint, we need to publish it in an AWS lambda, and it’s where the fun starts!
Visual Studio, with the ASW toolkit, provide a Publish to AWS Lambda… shortcut:
Publish to AWS Lambda…
Before publishing we need to understand what Publish to AWS Lambda means. In particular we need to know which AWS services will be created (also to understand what we will pay!).
AWS CloudFormation: think of it as a script that configure and starts all AWS services needed. It’s free.
Lambda function: the serverless function that will run the ASP.NET solution. Free for the first few millions calls.
S3 Bucket: the storage where the cloudformation script and the asp.net zipped solution will be stored. You pay for the disk usage.
API Gateway: the public endpoint that expose the ASP.NET site. Free for the first million calls monthly.
The Visual Studio project is already provided with a CloudFormationserverless.template configuration file that will create automatically all the AWS services required. This collection of services is called a stack.
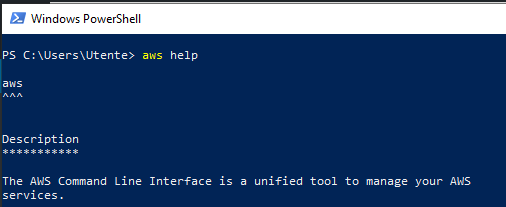
Prerequisite: Install the AWS CLI to do the advanced administative work. You can test it in PowerShell, enter aws help:
IAM: create the administrative account in AWS to upload and run the lambda
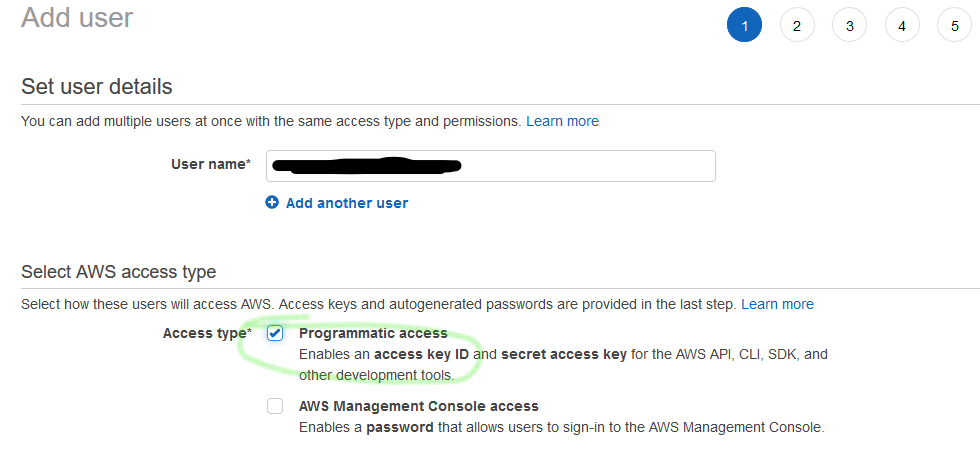
To run the publish wizard Visual Studio needs an AWS user with the proper permissions. Go to AWS console, select IAM service and go to Users▶Add.
Visual Studio will use AWS SDK, so a programmatic access it’s enough:
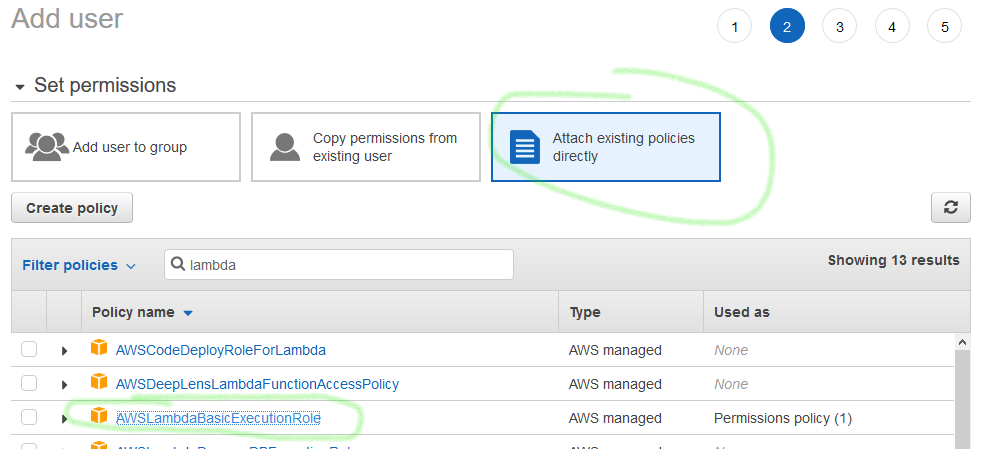
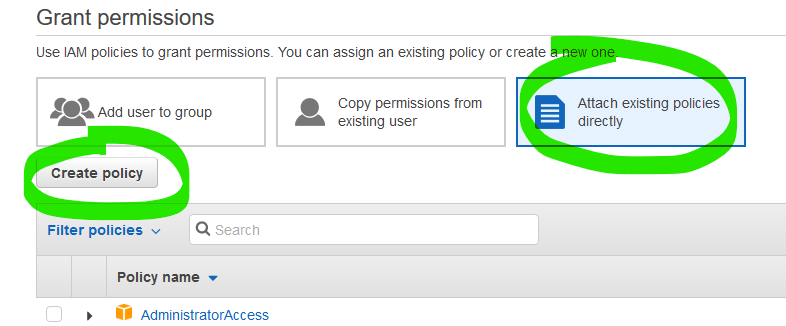
Step 2: Set Permission. Select the Attach existing policies directly and select
AWSLambdaBasicExecutionRole
AmazonS3FullAccess
AWSCloudFormationFullAccess
Step 3: Tags. Skip this step safely.
Step 4: Review. The review page should look like this:
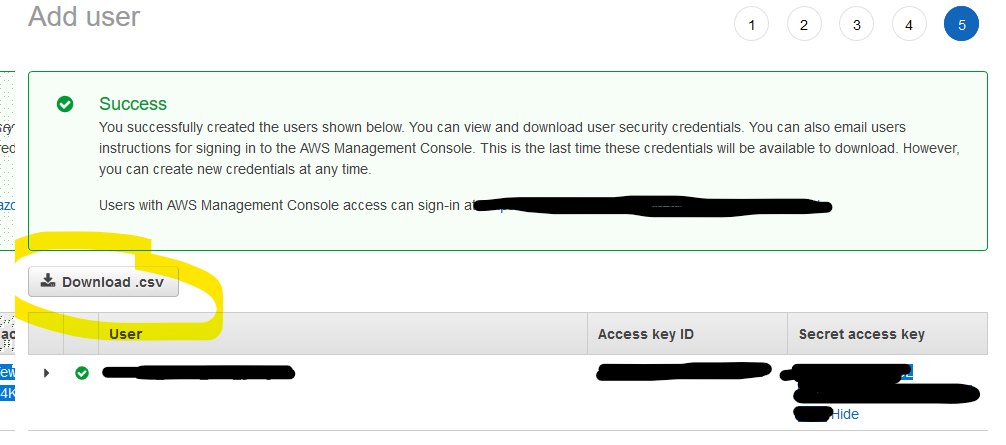
Click Create user. And be sure to download the CSV file!
This is your only chance to download the CSV file, make sure to backup it safely!
WARNING: The permissions set are not enough. The quickest way to configure the IAM user would be to give all permissions, but this could be a security issue. So we will select only the permissions we really need to create a ASP.NET stack.
Enter the IAM user and add a custom policy:
Add these permissions to the policy:
API Gateway
GET
DELETE
PATCH
POST
Lambda
GetFunction
GetFunctionConfiguration
CreateFunction
DeleteFunction
UpdateFunctionConfiguration
UpdateFunctionCode
AddPermission
RemovePermission
ListTags
TagResources
UntagResources
IAM
ListRolePolicies
ListRoles
ListRoleTags
ListUserTags
GetRole
CreateRole
DeleteRole
PassRole
AttachRolePolicy
DeleteRolePolicy
DetachRolePolicy
PutRolePolicy
Save the policy!
Let’s go back to Visual Studio
The CSV file is all we need to make Visual Studio publish the Lambda. Right click on the ASP.NET project and select Publish to AWS Lambda…:
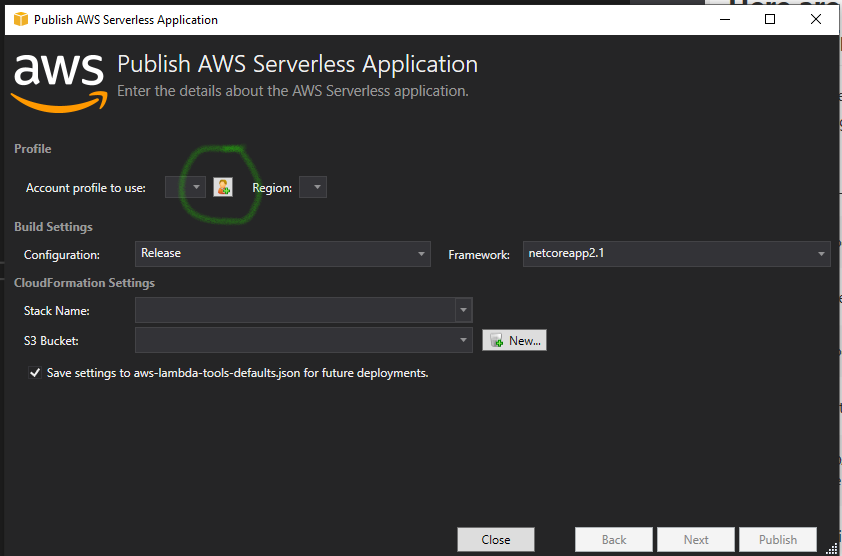
Click on the ‘+’ icon to upload the CSV:
Enter a Profile name and select the CSV file:
Create a bucket, and give a CloudFormation stack name:
This is the final screen of the configured wizard:
When clicking Publish the wizard will start uploading the lambda and then creating the infrastructure with CloudFormation. At the end the status window will show the progresses:
? Congratulations! Your OAuth server is ready on-air!